
A few years ago I performed this procedure. However, not having the repeated need to use it, I forgot it completely. For this reason I have created this blog, which is to serve as a “filing cabinet” to store all those tools that have been very useful to me at some point and that I hope can help anyone who needs them. This is the reason why I share these small experiences; clarifying that the information you will find below will be useful for users of GNU/Linux OS Manjaro x64 distribution.
What is FLAC?
The following is the definition provided by wikipedia:
FLAC (/flæk/; Free Lossless Audio Codec) is an audio coding format for lossless compression of digital audio, developed by the Xiph.Org Foundation, and is also the name of the free software project producing the FLAC tools, the reference software package that includes a codec implementation. Digital audio compressed by FLAC’s algorithm can typically be reduced to between 50 and 70 percent of its original size[4] and decompresses to an identical copy of the original audio data.
Free Lossless Audio Codec fromWikipedia, the free encyclopedia
In short, it is a format with which we can make a backup copy of our audio CDs without losing information. In contrast to lossy compression formats such as MP3 and Ogg vorbis among others.
Another important factor of FLAC is, to quote wikipedia:
FLAC is an open format with royalty-free licensing and a reference implementation which is free software. FLAC has support for metadata tagging, album cover art, and fast seeking.
Free Lossless Audio Codec from Wikipedia, the free encyclopedia
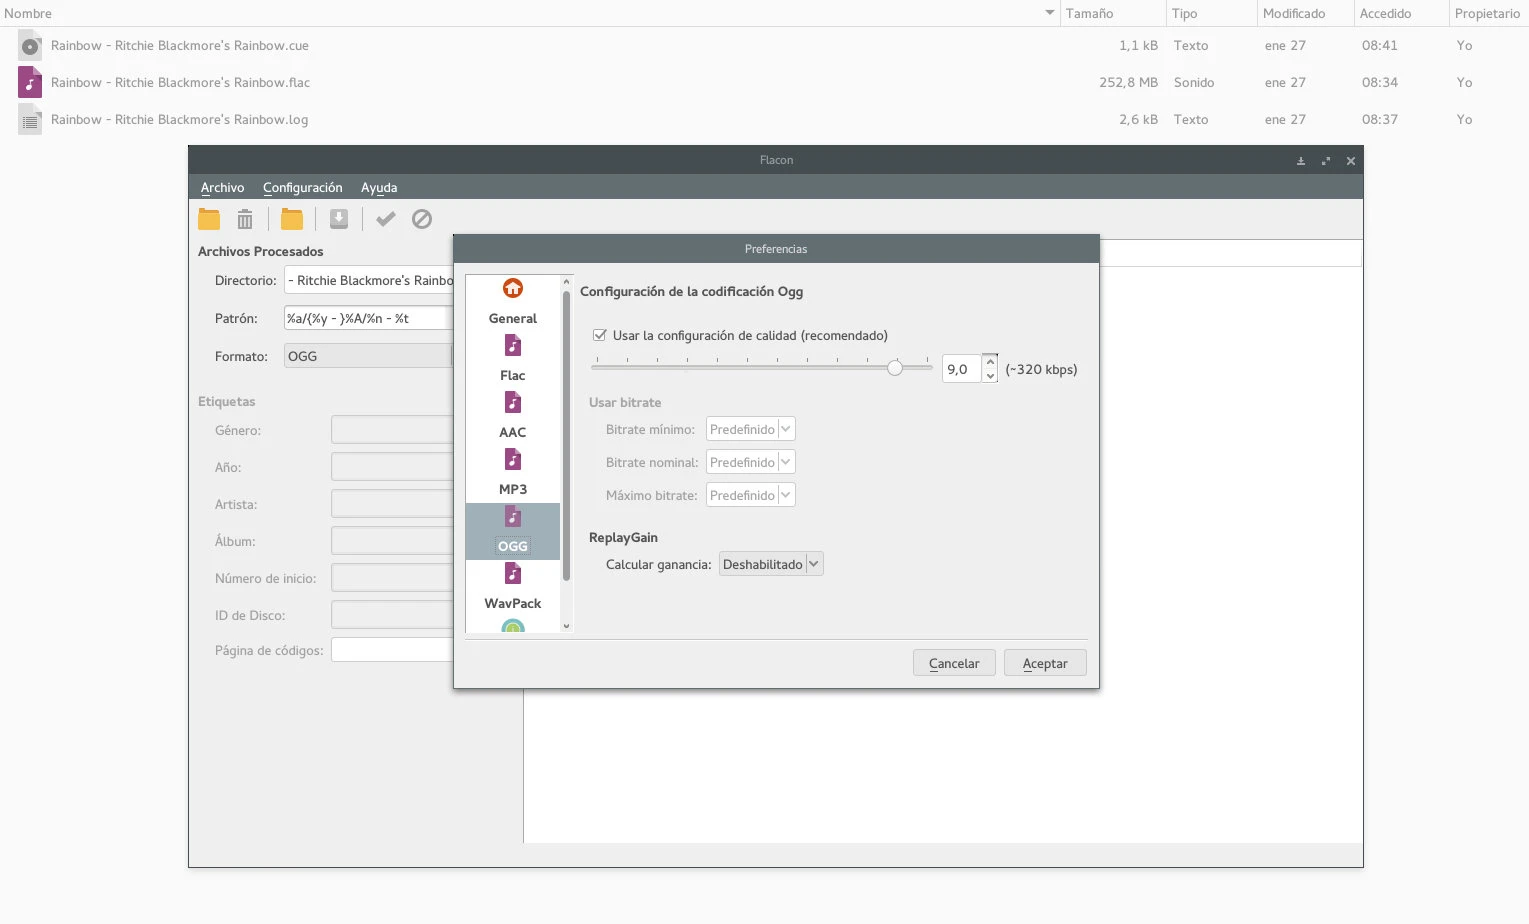
My goal is to obtain 320kpbs Ogg files (q9).
What is Ogg vorbis?
Vorbis is a free and open-source software project headed by the Xiph.Org Foundation. The project produces an audio coding format and software reference encoder/decoder (codec) for lossyaudio compression.
Vorbis from Wikipedia, the free encyclopedia
It is one of the many lossy compression formats, but unlike the popular MP3 format, Ogg vorbis is an open format. It is superior to MP3 at 192kbps and the difference in sound quality is barely perceptible at 320kbps, this for conventional audio equipment. For further information or comparisons between formats: ”ogg
Now let’s get down to work. Here is the FLAC format backup of the album Ritchie Blackmore’s Rainbow from Rainbow
Rainbow - Ritchie Blackmore Rainbow.cue
Rainbow - Ritchie Blackmore Rainbow.flac
The .cue file is a text file where the distribution of the audio tracks of a CD is specified, and this is its content:
REM GENRE Rock
REM DATE 1975
REM DISCID 8508C009
REM COMMENT "ExactAudioCopy v0.99pb1"
PERFORMER "Rainbow"
TITLE "Ritchie Blackmore's Rainbow"
FILE "Rainbow - Ritchie Blackmore's Rainbow.flac" WAVE
TRACK 01 AUDIO
TITLE "Man On The Silver Mountain"
PERFORMER "Rainbow"
INDEX 01 00:00:00
TRACK 02 AUDIO
TITLE "Self Portrait"
PERFORMER "Rainbow"
INDEX 01 04:37:18
TRACK 03 AUDIO
TITLE "Black Sheep Of The Family"
PERFORMER "Rainbow"
INDEX 01 07:54:26
TRACK 04 AUDIO
TITLE "Catch The Rainbow"
PERFORMER "Rainbow"
INDEX 01 11:17:31
TRACK 05 AUDIO
TITLE "Snake Charmer"
PERFORMER "Rainbow"
INDEX 01 17:57:18
TRACK 06 AUDIO
TITLE "The Temple Of The King"
PERFORMER "Rainbow"
INDEX 01 22:30:41
TRACK 07 AUDIO
TITLE "If You Don't Like Rock 'N' Roll"
PERFORMER "Rainbow"
INDEX 01 27:14:56
TRACK 08 AUDIO
TITLE "Sixteenth Century Greensleeves"
PERFORMER "Rainbow"
INDEX 01 29:53:53
TRACK 09 AUDIO
TITLE "Still I'm Sad"
PERFORMER "Rainbow"
INDEX 01 33:24:36
I will not go into details about the specifications of each part of the file, but it is enough to look at them to understand their structure.
As I said before, the main goal is to separate the .flac by tracks and convert each track to 320kbps ogg vorbis (q9), to play on pc, phone and portable player.
There are many ways to perform this procedure. You can use software from a graphical interface or from the console with a command line, as well as different steps; like first splitting the .flac file into the different tracks and then converting them to the desired final format, in my case ogg vorbis. I am going to resort to the simplest one, using a graphical interface. For this, we are going to use flacon a simple and powerful program that separates the tracks and converts them to mp3, ogg, acc, wav or just leave them in flac.
It can be installed from the terminal:
yaourt -S flaconOr from Octopi or the package manager. Remember that this program is in the AUR repositories, not in the native Manjaro repositories.
At this point it is installed and ready to use. The first thing to do is to select the .cue or .flac file, in this case the .cue which is where the track information is.

Next, we choose the output directory in the left panel of the application (Processed Files). In the Directory option, I have chosen the same path where the flac is located. Under Directory, we find the Pattern option, where we can create the naming pattern for the output files.

Now choose the output file format.
In the left panel we can view, change and verify the tags. This information is taken from the .cue file. The flac separation and encoding of the files is extremely short, less than a minute (approx) using an AMD fx8350 processor without oc.

And here is the final result:

I am satisfied with the results of flacon. It is fast and has a variety of options. In addition to FLAC files, it supports formats such as APE, WAV, TTA and others. But it requires a CUE file to read the data and to be able to separate the tracks. The program is only available for GNU/Linux. For ms windows or macOs there are other options. Remember: Google is your friend!
Note: There is an interesting program called Mp3splt but with limitations. It works from console although it has a graphical interface and is available for GNU/Linux, MS Windows and Mac OS. It only serves to separate FLAC files, although it can use the CUE or whitespace between tracks to separate them. It also supports tracktype.org.